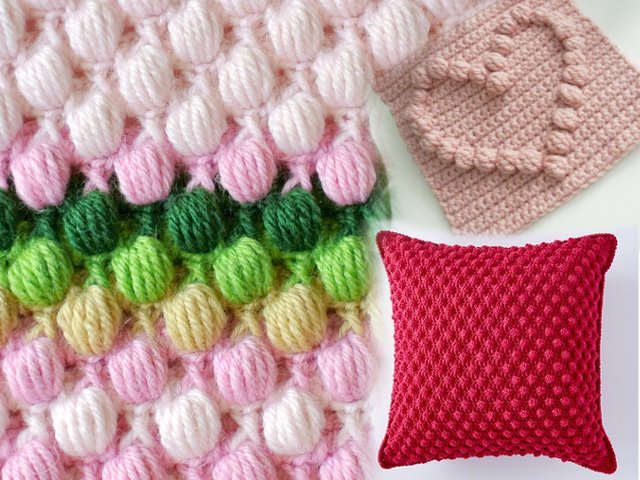
Looking for a pattern that you can decorate with a lot of crocheted things, giving them volume and a beautiful embossed texture? Tired of boring patterns on a knitted fabric? Then the best decision would be to decorate hats, scarves, sweaters, booties, snoods, cardigans or skirts with a bump pattern.
How to crochet cones
This volume knitting element, depending on the chosen pattern, can be either dense or openwork. The finished thing may consist entirely of cones, and may be in addition to a more even canvas or a quiet pattern. A variety of ways to knit cones with a crochet allows you to choose them for a wide variety of products, and at the same time always knit special things. Consider several options for how to crochet a cone pattern.
Scheme and Description
The bump element itself consists of unfinished columns with one or more crochets. It is made from one loop of the base and is also crocheted by one loop to a common vertex. The relief of the cone will depend on the number of columns in the element. The pattern of such cones will look different depending on the size of one element, as well as on the frequency of its repetition on the canvas.
How do the crochets fit in with a crochet, and how do the knitting patterns of these elements differ? Consider several ways to knit cones.
- Crochet bumps pattern: diagram and description for beginners
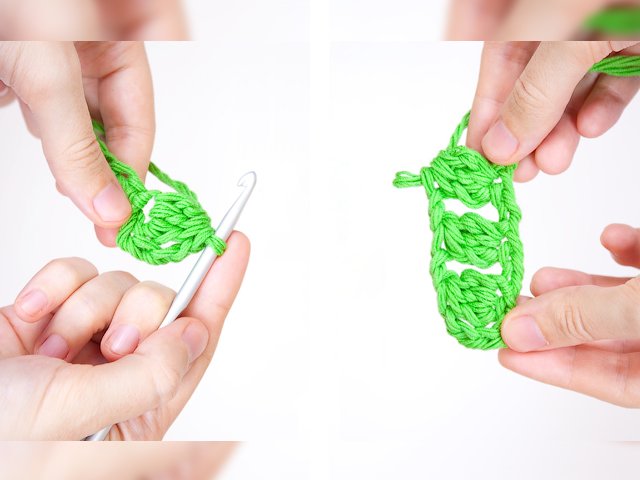
For the simplest example, a bump of three double crochets with a common top and a common puncture point is suitable. We will knit according to the following pattern:

Working process:
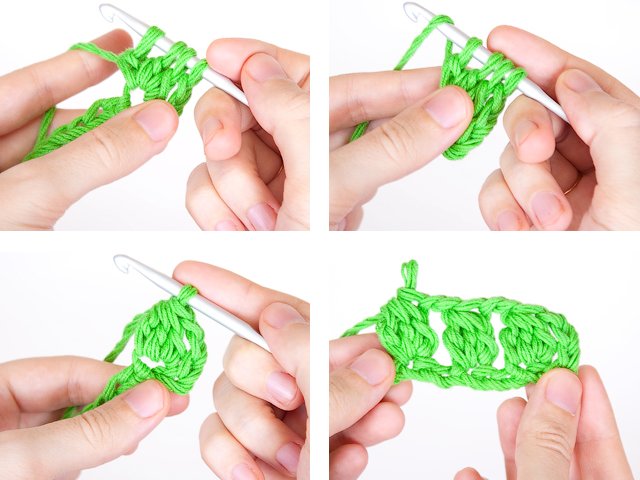
We knit a chain of air loops, make a yarn, insert a hook 6 from the hook, loop the chain (photo 1), grab the thread and pull out a new loop (photo 2). Then grab the thread and knit 2 loops, we get an un knitted column with a crochet (photo 3), then make a crochet (photo 4).
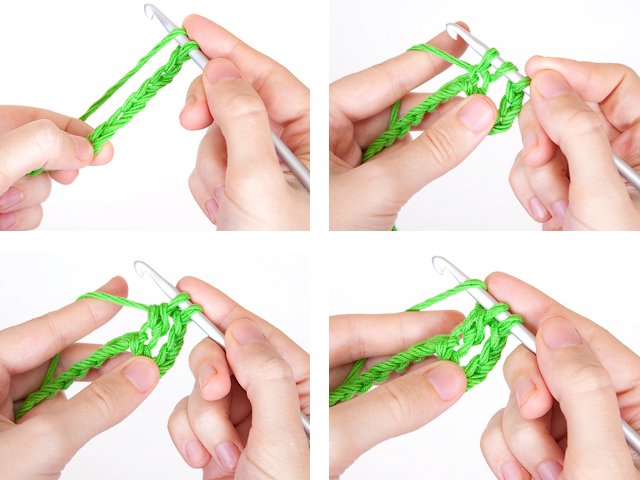
We introduce a hook into the same loop of the base, grab the thread and pull out a new loop (photo 1), then grab the thread and knit 2 loops, we get a second un knitted crochet post (photo 2). Again we crochet (photo 3), insert the hook into the same loop of the base and pull out a new loop (photo 4).
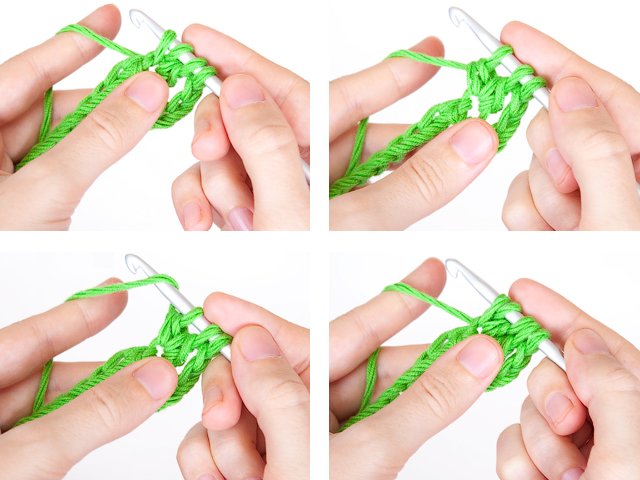
Grab the thread and knit 2 loops, we get the third unbound knit crochet (photo 1). Next, we need to knit these 3 unbound knit stitches together, for this we grab the thread (photo 2). We knit all 4 loops on the hook in one go (photo 3). The result will be such bumps (photo 4).
- Pattern "cones" or "nuts"
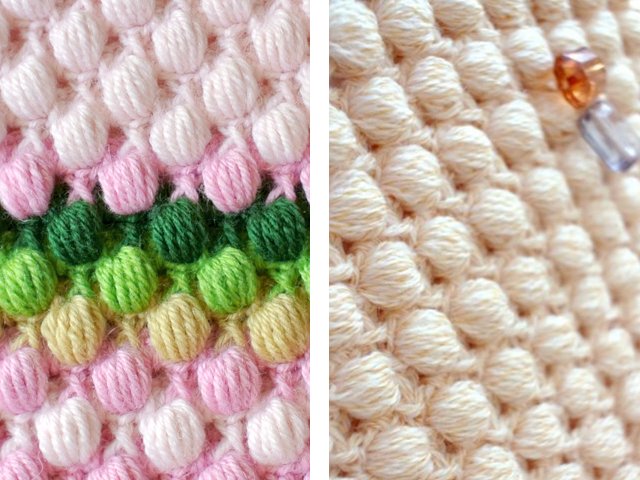
A beautiful volumetric pattern will be good for rugs and baby blankets. It is knitted from a lush column, and the pattern repeat is 4 loops + 2. Knit a pattern according to the following pattern:
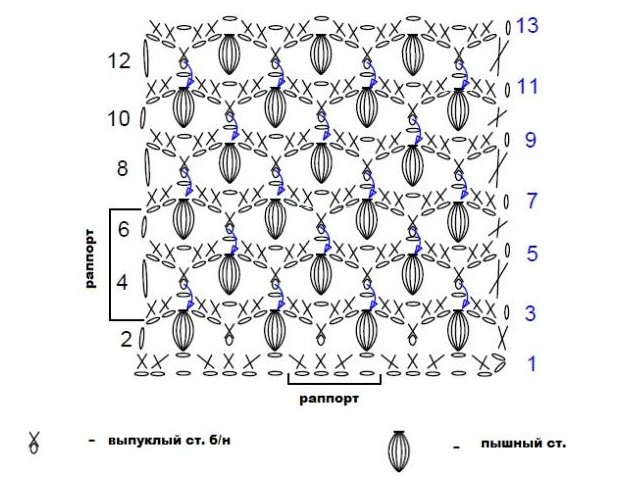
Lush column: * make a crochet, insert a hook into the arch under the air.p., make a crochet, stretch the thread through the loop. Repeat * 5 more times, then double crochet on the hook and stretch it through all the loops on the hook.
1st row: skip 2 air and knit 1 tbsp. non-cash next loop, * 1 air; 1 tbsp. non-cash next 3 air units, repeat from *, end the row - 1 air unit, skip 1 air unit, 2 tbsp. non-cash last 2 air.p., rotate knitting.
2 row: 3 air units, * 1 first column in the next. arch of airways, 2 airways, 1 convex non-cash in Art. non-cash one row lower, 2 air units, repeat from *, 1 magnificent st. nextair item, 2 air item, 1 tbsp. б / н in the 2nd air-port, turn knitting.
3 row: 1 air unit, * 2 tbsp. non-cash next acre of 2 air units, 1 air unit, repeat from *, 2 tbsp. b / n in the arch of 3 air units, turn knitting.
4th row: 3 air units, * 1 convex st. non-cash in magnificent article lower row, 2 airways, 1 magnificent Art. to the arch from the air unit, 2 air units, repeat from *, end with 1 convex st. non-cash in lush st., 2 airways, 1 tbsp. non-cash last Art. / n previous row, rotate knitting.

5 row: knit as 3 row.
6 row: 3 airways, * 1 magnificent art. in air., 2 air., 1 convex Art. non-cash in magnificent article previous row, 2 air units, repeat from *, finish - 1 magnificent Art., 2 air units, 1 Art. non-cash last Art. b / n previous. row, rotate knitting.
Then repeat 3-6 rows to the required length.
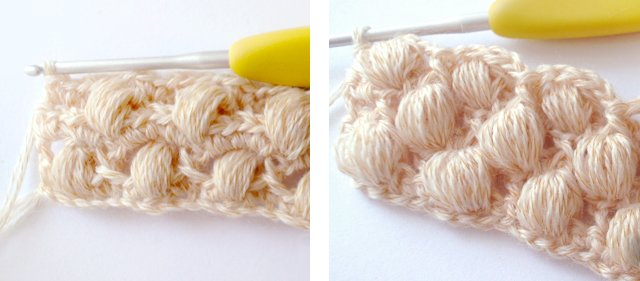
- Rare cones
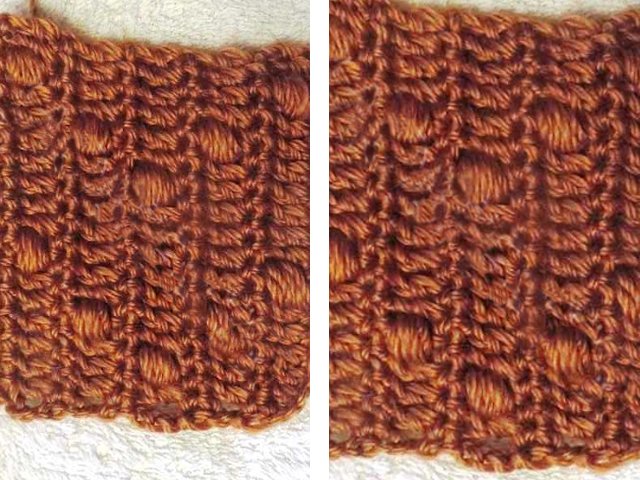
Another interesting pattern of cones, which can be used as a decorative one for flat simple dense. So, when crocheting, you can create whole patterns from similar volumetric cones. It should be noted that knitting these cones has its own small feature. Knit such a product decoration is necessary according to the following scheme:
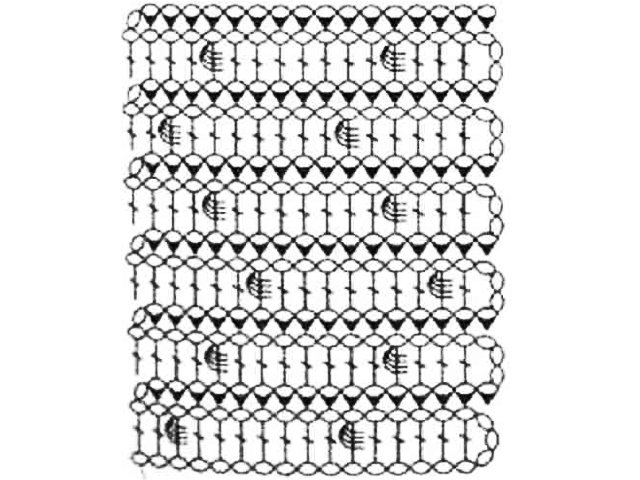
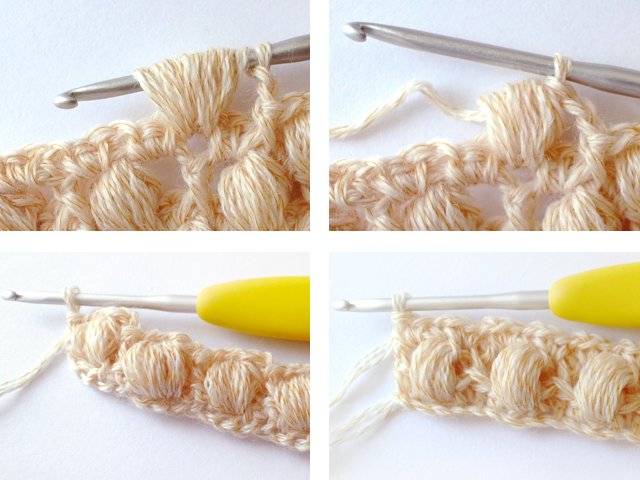
A bump with a crochet is performed on an un knitted double crochet: we knit a double crochet not only to the end, but only to half, so that two loops remain on the hook.
We make a crochet and introduce a hook under this same loose knot. We grab the working thread and pull out the loop - 4 loops on the hook.
Repeat this operation ** three more times. * Yarn, pulled out a loop * ... As a result, there are 10 loops on the hook.
We grab the working thread and pull it through all ten loops on the hook in one go. No loops for fastening. Next, we knit the next column according to the drawing.
This technique is called a knob crocheted around a crochet post.
Now let's try to connect the pattern with the bumps based on the above diagram.
We knit a chain of 16 VP +3 VP for lifting.
1 row - 5 CCH, element bump:
We knit CCH - yarn, insert the hook into the loop of the chain and pull the working thread - three loops on the hook, grab the working thread and stretch it through two loops on the hook.
And then, we make a crochet and enter the hook already under this same loose knot and from there we stretch the loop ...
Then again the yarn and again the hook under this column - we extend the loop.
We repeat this operation only 4 times - on the hook there are 10 loops that need to be closed in one go (put the thread on the hook and pull it immediately through 10 loops).
So we got the first bump crocheted around the column.
Next, 7 CCH and again bump, 2 CCH.
2 row and all even rows - 2 VP for lifting, RLS.
3 row - 3 VP for lifting, 3 CCH, bump, 7 CCH, bump, 4 CCH.
5 row - 3 VP for lifting, 1 CCH, bump, 7 CCH, bump, 6 CCH.
7 row - like the 3rd.
9 row - like the first one.
If necessary, then repeat from the 3rd row.
Video lesson
A video master class from a professional knitter will help you quickly learn how to knit cones for beginners. As can be seen from the video, such a pattern can be done quickly and without stressful calculations.
Crochet bumps pattern - video:







Thank you very much for the article on your site. It is useful in every sense: all examples are given in an accessible form for perception, even if you have not previously been engaged in or have been engaged in needlework for a very long time, everything can be understood and reproduced. But the most amazing thing is that I looked at your pages and I had a lot of ideas for creating cozy home gizmos. Thank you very much!!!