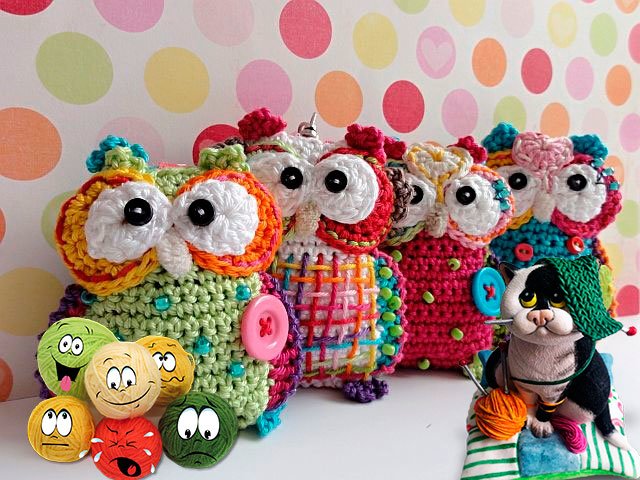
Knitted toys have always been popular with both children and adults. You can create wonderful products with your own hands: small pillows, Christmas tree decorations or simple and funny toys for children.
Of can be knitted from yarn (residues) as a gift, or sew, taking any material.
Often needlewomen combine these two techniques: they knit some product, and then decorate it with felt inserts, for example. We will teach you how to knit toys with patterns and description with crochet and knitting needles, provide you with the simplest patterns for beginners and effective and useful master classes with a detailed description. And your child can help in this matter - the process will go faster and more fun!
Crochet knitting toys and do-it-yourself knitting toys
Make cute gift to your loved ones is very simple. Crochet and knitting toys very common on the Internet, very often exhibit detailed master classes with descriptions. It is enough to tie some little animal with it yourself: a mouse, a bear, a kitten, using special “patterns” - knitting patterns. If you follow the tips on how to do this correctly, then the process will go very fast. Today we will analyze two ways: Crochet and knitting needles. There is no easier or harder way - choose the one that works best for you. And, if you are a beginner, then you will find understandable and detailed mk with pictures and video tutorials.
Crochet toys with patterns and descriptions for beginners
To begin with, you need to decide what you will knit. To do this, you can see different schemes on the internet or choose one of thosethat we will provide below. If there are a lot of diverse options, from which you should choose for yourself. Finding them on the Internet is quite simple, so if you want to find such a section, it is on almost every knitting site.
Most often, beginners are offered to tie a toy - house, since it fits the easiest, and you need to fill your hand before performing complex work! Need to tie 6 side edges of the house (6 squares of the same size as tall as you like), make a roof and stitch all these parts in 1. Fill with a padding polyester or filler, then decorate the walls: make a door where guard dogs, flowers in windows, curtains and so on can sit. The knitted house is ready! Here is such a master class!


We crochet toys: a master class step by step with a photo
When we knit toys crochet, it is very convenient to work with diagrams and a simple description. We will tell you how to create beautiful knitted monkey, which can later be used as a brooch or how trinket, or sew somewhere. For her you will need: brown and beige yarn, hook, needle, black thread and beads for eyes. If you want to make a brooch from it, then take the mechanism for the brooch. This crochet master class can be interpreted in different ways.
So, then goes the description of the 6 first rows:
- 6 S.B.N. in the ring amigurumi or in V.P.
- ETC. = 6 times
- S.B.N., P.R. = 6 reps
- 2 S.B.N., P.R. = 6 reps
- 3 S.B.N., P.R. as much as in paragraph above
- 5 S.B.N. Next, change the thread to a lighter one to make the ears: 8 S.S.N. in the 3rd loop from the working loop. We knit with a dark thread 10 S.B.N. (also 3 loops from the hook), light thread 8 S.S.N. (in 3 loops), dark color - 5 S.B.N. (in 3 loop)
- The front of the monkey is ready!

Now we will proceed in stages to the preparation of the back. It is performed in exactly the same way as the front one, only the thread does not need to be changed! To tie the muzzle - Take a thinner thread and use a thin hook to make it not bulky.
- 4 V.P., 2 S.B.N. in the 2nd loop, 1 S.B.N., in the last loop 3 S.B.N.
The next step will be a tie on the back of the chain: 1 S.B.N. + 1 more in the first chain.
- ETC. 2 times, 1 S.B.N., P.R. 3 times, 1 S.B.N. and P.R.
- 1 S.B.N. and P.R. - 2 times, 1 S.B.N., 1 S.B.N. and P.R. - 3 times, 2 S.B.N. and P.R. At this stage, you should get 20 loops.
- 20 S.B.N.
- 4 connecting posts, 8 V.P. through two loops of S.S., 8 V.P., through 2 loops of 11 S.S.


We do not cut the thread, because need to start front design, to which we sew the muzzle itself. Do not forget to fill the toy. Sew on eyes, nose, mouth and decorate with a flower.
Crochet toys for kids
Kids like bright soft toysthat you can touch, pull the tail (if any). A good choice would be monkey, lamb or bunny. Also suitable Teddy bear, giraffe, bear, mouse, fox and mother - fox, butterfly with colored wings, Pinocchio, Minion (description below in the article), penguin, elephant, kittens - who only does not knit modern craftswomen! You can come up with small animals on sticks for a puppet theater: light crafts will not leave anyone indifferent. This, by the way, can be Smeshariki or the popular Luntik.
With the help of such toys you can teach your baby various animals, show how they differ, especially tactile sensations for children - this is very good. The child will be able to learn to distinguish between animals much earlier.. You can also make something like educational games with a child, using such toys.
And for newborn babies, you can knit small toys for children mobile. Let funny hares, puppies and birds help your child fall asleep better!
Master class to create this cute kitten. It can not only be sewn on mobilebut also make of it trinket, sew on a backpack, create unusual brooches, hook on a cap or jacket.
You can, in addition, to tie such a cat, do the same hat kitty halloween (or other cool models) for a girl:
Crochet toys with patterns and description: video
DIY knitting toys with a description and do-it-yourself patterns
We will connect a wonderful Moidodyra knitting needles for your child! You will need an acrylic thread in colors: white, blue, yellow, hook, knitting needles, felt for eyes, or already purchased ready-made, box in the form of a cube and wire.
Need to tie one strip smooth surface, i.e. where the front rows are the front loops, where the purl R. are the purl loops. The second lane will consist of half wrong side and second half - facial. These resulting strips need to sheathe the box around the perimeter, you can insert the wire.
Collect like this: stick eyes, mouth, wire nose, mouth and conch. To knit a towel like in the picture below: knit 10 stitches with the front stitch to the length you need. If you want, you can do strips and fringe at the ends.
For pelvis, dial 6 V.P. crocheted into a ring. Next: 8 S.B.N. Knit doubling S.B.N. Knit the next three rows evenly, then double again, then knit evenly. The mouth is made according to the scheme below.
Knitting toys: one-piece master class
This knitting technique is considered one of the easiest.. For her, in principle, even a diagram and description are not required. This is the most common option for beginner needlewomen. How to link such a product, the video below will tell you. It, if desired, can be downloaded, as well as a diagram from the Internet. It is not at all difficult to do, it takes a little effort. Especially young children will like it!
How to knit a toy with knitting needles for beginners: the easiest in video
Knitting toys: photos and ideas for knitting
Knitted toys with knitting needles for beginners and professionals - the most interesting thing with us! This year are especially popular. pandas, pigs, easter bunnies, hedgehogs, bees and many other animals.


Amigurumi miniature crochet toys
Knitted toys amigurumi crocheting is very popular on the Internet, you can easily find schemes and descriptions for them, and more than one master class. The art of amigurumi is beautiful and cute animals (for example, pig, cats and cats, fox, miniature dogs, bunny, snake, chicken, monkey, frog and others), endowed with human properties. Also, it can be, for example, ice cream or some sweets in the form of cupcakes. They must have a face / muzzle with shiny eyes and a welcoming look! We have more than one photograph in our article, so you won’t pass by.
Knitted beautiful gift toys
As a gift you can knit absolutely any animalbut now they are very popular knitted seals. For it you will need threads of white, gray colors, filler, gray felt and black threads, you can take a floss. HTo glue felt to the cat - use glue or a glue gun. It can be crocheted or knitted, but with other patterns and description. In white dial 6 V.P. Start with the 2nd loop from the hook, 4 sb.b.n. behind the back walls of the eyelets. 3 S.B.N. to the next S.B.N. To work further, unfold the product and 5 S.B.N. in the front walls of the loops. Below is a photo: what the canvas should look like after the first lap.
- Next: 1 S.B.N., P.R. * 6 times
- 2 S.B.N., P.R. * 6
- In 4 and 5 R. = 24 S. B.N. Now is the time for eye embroidery
- 2 S.B.N. WB * 6
- 1 S.B.N., U.B. * 6. After this step, fill your head with sintepon, fillers, cotton
- W.B. * 6. After closing the loop - hide the thread

Making the paws of a toy grayed out: Amigrumi ring from 5 V.P., P.R. + 1 S.B.N. + P.R. + 1 S.B.N. + P.R. In 3, 4 and 5 R. = 8 S. B.N. Take white threads and start knitting from the back leg: 4 S.B.N. from the front of + 5 V.P. Next 4 4 S.B.N. also in front of the legs. Gets a circular row in 34 loops:
- 2 - 3 P .: 34 S. B.N.
- U. B. B., 14 S. B. N., U B. B. 16 S. B. N.
- 2 S.B.N. + WB = 8 times
- 24 S.B.N.
- 2 S.B.N. + WB = 6. After this step, you can fill the body.
- 1 S.B.N. + WB = 6
- W.B. 6 times. The body should look like this:

Two ears grayed out: 3 S.B.N. in the ring of amigurumi, 2 S.B.N. in every S. B.N.
The tail is also gray: 5 V.P. in the ring, from 2 to 10 row 5, S.B.N.
Next, collect the kitty: we sew the ears and tail, the head, and glue the muzzle from felt and embroider the mouth and nose. This master class is very easy, but the result will be very pleased!
Crochet the minion: diagram and video
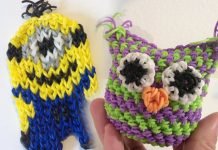
Now no need to buy Cartoons Minion - can tie him herself! In order to do this, take the following materials: thread (yellow, blue, black, white) hook, filler for toys, beads for eyes and any other decoration and accessories (decor depends on preference).So, let's start creating an author's gift!
To begin with, we will connect the base, that is, the body and head of the minion.
- 6 V.P. tie in a single ring
- The increase is 6 times (increase, then P.R. - we knit two columns in one loop). 12 loops should come out
- 1 single crochet (hereinafter - S.B.N.) + P.R = 6 times
- 2 S.B.N., P.R. = 6 times
- Three S.B.N., P.R. = 6 times
- 4 S.B.N., P.R. = 6 times
- 5 S.B.N., P.R., = 6 times. On this row you should have 42 loops!
- 6 S.B.N., P.R. = 6 times
- 7 S.B.N., P.R. = 6 times
- 8 S.B.N., P.R. also six times.
- From 11 rows to 31 inclusive, knit 60 columns.
- 32 row (hereinafter - R.) 8 S.B.N., decrease (decrease - we knit two columns together, then - UB) 6 times. (Further, from step 32 to step 40, all columns with decrements are knitted 6 times.)
- 33 R. - 7 S.B.N., U.B.
- 34 R. - 6 S.B.N., U.B.
- 35 R. - 5 S.B.N., U.B.
- Do not forget to stuff your toy with a filler during knitting!
- 36 R. - 4 S.B.N., U.B.
- 37 R. - 3 S.B.N., U.B.
- 38 R. - 2 S.B.N., U.B.
- 39 R. - 1 S.B.N., U.B.
- 40 R. - W.B. six times. At this stage there should be 6 loops.
Start knitting a minion - this is his head, and end - will be located under the jumpsuit, which we will do now! Take the blue yarn.
- 6 V.P. into the ring. Next P.R. 6 times, get 12 loops.
- 1 S.B.N., P.R. = 6 times (all repetitions up to 10 rows 6 times)
- 2 S.B.N., P.R.
- 3 S.B.N., P.R.
- 4 S.B.N., P.R.
- 5 S.B.N., P.R.
- 6 S.B.N., P.R.
- 7 S.B.N., P.R.
- 10 row: 8 S.B.N., P.R.
- From 11 to 14 rows we knit 60 S.B.N. and turn the product over. This must be done in order to arrange the front of the clothes.
- In 15 R. - 14 S. B.N.
- 1 V.P., 14 S.B.N.
- 1 V.P., U. B., 10 S. B. N., U. B.
- 1 V.P., 12 S.B.N.
- 1 V.P., U. B., 8 S. B. N., U. B. In the end, it should come out 12 posts, after which we cut the thread.

Next, you need to find 10 row, count 16 columns on it and at 17 attach a thread so that the front part can be tied in rotary rows. Just need to knit 6 P.
- 14 S.B.N.
- 1 V.P., 14 S.B.N.
- 1 V.P., U. B., 10 S. B. N., U. B.
- 1 V.P., 12 S.B.N.
- 1 V.P., U. B., 8 S. B. N., U. B.
- 1 V.P., 10 S.B.N. at the end there will be 10 loops.
You should tie the resulting shorts for a toy. On the side of the back - down 5 S.B.N., 16 S.B.N., we make an ascent from the side to 5 S.B.N. + 23 V.P. Next, we need to return to the place from which we came: 22 S.B.N., 10 S.B.N. and 23 V.P.
Again we go back with the help of 22 S. B.N., down 5 S. B. N., 16 S. B. N. and rise - 5 S. B.N. On this little thing is finished, you can cut the thread.
Can add on top pocket, you can not do this. We will explain this step in detail, and you can skip it! Ring of 5 V.P., which does not need to be closed. Next, the knitting will go with the help of rotary loops. ETC. 5 times, 10 S.B.N., 7 connecting posts (hereinafter - S.S.).
We will make the threads of black color footwear: 6 V.P. into the ring. ETC. 6 times, 12 S.B.N. (all 3 and 4 rows), 4 S.B.N. + WB 2 times. From the sixth to the ninth rows of 10 S. B.N. Next, directly to the boot, sew the leg in blue. We collect on it 12 S. B.N., 3 S. B.N., P.R. 3 times, and 15 S.B.N. in the last fifth row.
Cuffs and arm. Hand consists of black and yellow thread. Let's start with the first one. 6 V.P. in the ring, P.R. 6 times, (rows 3 to 5) 12 S.B.N., 5 U.B. After that we tie the yellow thread: 7 S.B.N. on the back wall, (from 8 to 16 R.) 7 S. B.N., in the last row 2 U. B.
To tie cuffs we knit two rows: 2 S.B.N., P.R., S.B.N., P.R. and 9 S.B.N.
For the eyes we knit two circles of white and black thread. Glue or sew a bead in the middle. To connect them together, dial 45 V.P. and 44 S.B.N. in two R.
It will be a strap for them! Everything is ready! Remember to stitch or glue all the pieces together! You can make him a hairstyle of black thread.
You can see how it does talented needlewoman on your channel on YouTube. She has completely different approachbut the result is also great!
Photos of famous works: ideas for inspiration
There's a lot famous needlewomen, and not only among women who may boast wonderful knitting work. We suggest you evaluate the work Alan Darth, Mary Jane, Susan Hickson, Elena Belova. Beautiful works will help you inspire and you will have the strength to create more. Just need to be warned: this work is not for beginners, they are very complex and require a lot of effort and time.








Good time to all. The article is just wonderful. The most important thing is understandable, a lot of new and interesting. Creative success.
it's good when there is a site where you can learn to knit toys
Good afternoon) Thanks for the article! thanks for the needlework! Beautiful works, interesting information, videos are very valuable (since everything can be considered in more detail in them). True, I, as a beginner and with little experience, didn’t penetrate into the abbreviations in the description of the steps of knitting toys, I would like to be more detailed (probably for those who knit for a while everything is more clear)). For example, I liked the first simplest job about the house, but it would be interesting to learn about how to knit the rest of the details (windows, doors, roof).
Nothing is clear. I thought I would find the circuit. Not found((((
Very cute knitted toys. Instead of shopping, I would impose such for children, it would be much more interesting.