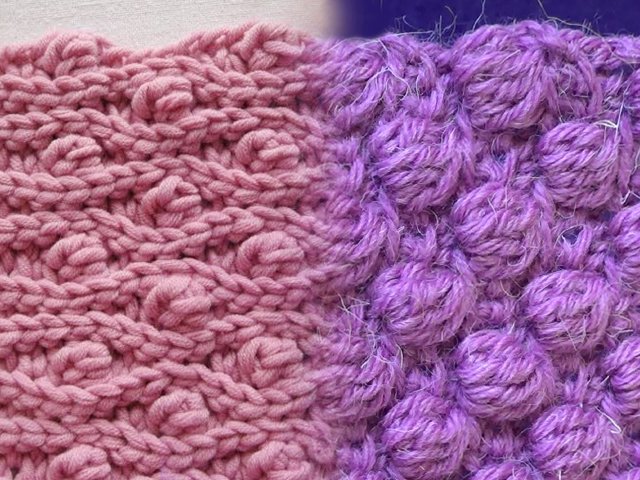
Dense patterns often knit warm clothes, so necessary for every person in the cold season. These patterns make coats, skirts, hats, rugs and sweaters made of thick yarn, which are likely to warm and give comfort during bad weather. In addition, another advantage of dense patterns is the ability to perfectly maintain its original shape.
These patterns are crocheted by interlacing different types of columns. That is why there are a lot of variations of these thick and seemingly knocked down patterns, among which there are both simple ordinary ornaments of yarn, and interlacing of threads of incredible beauty.
Dense crochet patterns - diagrams and description
Dense patterns are selected depending on the type of clothing and the ideas of the author. Let us consider in detail some of the methods for crocheting dense patterns and schemes for their implementation, which differ in complexity. Let's start with the most simple dense patterns that even beginner masters will be able to tie.
Knitting for beginners
Crocheting dense patterns in itself is considered a fairly simple task, since the fabric makes them thick, and some even call them rough. Dense patterns are considered the exact opposite of delicate and airy openwork patterns, so beginners should start their acquaintance with this craft precisely with the implementation of dense patterns. These patterns are also convenient because they train inexperienced knitters to regularly perform fairly simple hook manipulations.
- Single crochet pattern

The simplest dense pattern based on single crochet posts. The pattern begins with a set of air loops. The first column is knitted into the second loop from the hook (one lifting loop).
1st row: 1 lifting loop, * 1 single crochet for one wall of the loop *;
2 row: 1 lifting loop, * 1 single crochet “into the loop” *.
All other rows are knitted as a second row.
- Extra long single crochet

This pattern is very similar to the previous one, so knitting it is just as easy, and the fabric from it is softer and more elastic than from simple single crochet posts. In addition, he will have something in common with openwork patterns due to the "gaps" between the elements.
Initial chain of air loops: 2 lifting loops, the first column fits into the third air loop from the hook.
Insert the hook into the loop, grab the working thread and pull it through the loop. There must be 2 loops on the hook. Knit the air loop through the first loop on the hook.
And again, there should be 2 loops on the hook. Tie a column by stretching the working thread through the remaining 2 loops. Next, knit columns in each loop of the row.
- Bosnian pattern

A very dense pattern that does not stretch in width, but stretches in length. This pattern is crocheted by half-columns for the back wall of the loop. You do not need to knit a lifting loop, but the first column in a row is always knitted for both walls of the loop in the first loop from the hook.
1st row: half-column “into the loop” * 1 half-column behind the back wall of the loop *.
The vertical pattern rapport is one row.
Hat ideas
A good choice would be a dense crochet pattern for a hat.Since the purpose of this product is to keep your head warm and protect your hair from wind and frost, it is better to knit hats with dense patterns. Let's look at some good options for dense patterns for crocheted hats.
- Two-color waves

A beautiful dense pattern that looks good on hats.
Air number n. the set-up chain is a multiple of 3 + 1 + 2 air. item lift.
1st row: 2 air item lift, 2 tbsp. s / n in 1 p. of the base, skip 2 air. item dialed chain, * 1 tbsp. non-cash and 2 tbsp. s / n in 1 p. of the base, skip 2 air. item dialed chain, repeat from *, 1 tbsp. non-cash
2 row: 2 air item lift, 2 tbsp. s / n in 1 p. of the basis, * 1 tbsp. non-cash and 2 tbsp. s / n in the art. non-cash, repeat from *, 1 tbsp. non-air item lift. Repeat 2nd p.
- Scales

A more complex pattern, but interesting and original in form. Volumetric scales are perfect for children's hats and scarves. The pattern will take a fairly large amount of yarn. Let us consider in more detail how this unusual pattern fits.
Gather a chain of air loops, the number of loops should be a multiple of 6 + 1 vp. equalization + 2 vp lift + 1 vp for the pattern. 6 loops of an air chain is one flake.
1st row: In the 7th air loop we knit 1 tbsp. s / n, 1 vp, in the same loop 1 tbsp. s / n, 1 vp, skip 2 loops of the base, in the next 1 tbsp. s / n, 1 vp, skip 2 loops of the base and knit 1 tbsp. s / n, 1 v.p., 1 tbsp. s / n in one loop. Then continue the pattern alternating a single double crochet with a checkmark in one loop to the end of the row. The row should end with a single crochet.
2 row: 2 row: Turn the work sideways loop on the hook up. Make a crochet on the hook and enter the hook under the first wall of the checkmark of the previous row, knit the first crochet column, also do another 4 tbsp. s / n (the number of columns depends on the thickness of the thread, if you chose a thin thread, then you need to increase the number of columns, if the thread is thick, then reduce). Further, without making additional loops, knit another 5 tbsp. s / n for the second wall of the checkmark. Turn the work to yourself inside out, i.e. mesh back to your drawing and attach the connecting column (half-column) to the loop of a single column with a crochet of the previous row. Again, turn the work with a pattern to yourself and again knit a tick for 5 tbsp. s / n for each wall and reconnect the connection. Art. (polust.) per loop of a single art. s / n of the previous row. And so do the rest of the row. Attach the last flake to the second air. The loop of the previous row.
Important: If you want to make not scales, but leaves, then after knitting 5 tbsp. s / n for the first check mark, do 2 air and knit st.st. into the second loop from the hook, and then knit 5 tbsp. s / n for the second wall of the checkmark.
3 row: This row is increased by 2 scales. When knitting a pattern, you will alternate rows, then more, then fewer scales, but at the same time on the reverse groan the canvas will have an even appearance, and you can easily connect the parts. You start the series with a set of 3 vp for the first tick of a new row + 1 vp and knit the first double crochet in the same loop where the air loops began, 1 VP, knit the double crochet in the middle of the scale, 1 VP between the scales again a tick and so on until the end of the row. At the end of the row, we knit a checkmark into the last loop.
4 row: Repeat the “Scale” pattern, as in the second row. When the last crochet column is knitted in the last flake, then knit the connecting column in the middle of the flake, thereby fixing the end of the row.
5 row: It is necessary to reduce the number of flakes again, so the set of rows starts with 3 air loops (this is a single double crochet) + 1 vp and then again knit a tick between the scales. The row ends with knitting a single column in the middle of the last flake.
6 row: knit the pattern again, as in the third row.
Thus, the scales alternate: more or less.
You can also knit according to these step-by-step photos:

Skirt Pattern Master Class
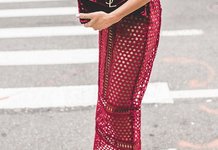
When choosing suitable knitting options for different models of clothing, it is often advised that the pattern is dense for a crochet skirt, since the finished product for a long time pleases its owner with its original form, does not stretch, looks interesting and original, and most importantly - it does not freeze. Consider several options suitable for skirts patterns.
- Shells

Despite the small openwork, the shell shell is dense. This beautiful pattern is knitted with columns with one or more crochets in one loop, after which a single crochet is knitted, in which a fan is knitted in the next rows.
First you need to dial the number of loops that you need, but it must be a multiple of 6 and plus 2 loops (for lifting).
Next, we crochet a dense pattern according to the following pattern:
1st row: Knit a single crochet in the second air loop from the hook, then skip 2 air loops and knit a single crochet 5 times in the same next air loop. Skip the next two air loops and knit a single crochet into the third loop, then 2 air loops are skipped and the fan is knitted again. And so it fits to the end of the row.
2 row: Knit 3 lifting stitches and 2 more double crochets, i.e. in the last single crochet. 3 lifting stitches replace 1 double crochet. Next, a single crochet is crocheted into the third crochet from the fan of the previous row. A fan is crocheted in a single crochet of the previous row. Knitting continues to the end of the row. The row ends with three double crochet into the single crochet of the previous row.
3 row: 1 air loop of lifting is knitted and a single crochet is knitted in the first column with a crochet of the previous row. A fan is knitted into a single crochet of the previous row. Knit to the end of the row. The row ends with a single crochet in the third lift loop of the previous row.
Next, repeat the last 2 rows to the desired length of the product.
- Bumps

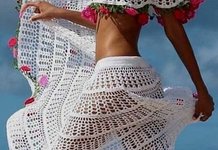
This thick openwork pattern is perfect for a summer skirt. The pattern is simple, and it fits pretty quickly. Consider the method of knitting in more detail.
First you need to tie a chain of odd-amount air loops plus 3 loops for lifting. To knit “bigwigs” you will need to knit three double crochet stitches into the same stitch without taking the last step and then knit all unfinished single crochet stitches. In a way, it seems like a decrease.
In the fourth loop of the base you need to knit 3 double crochet, but do not finish them, i.e. you make a crochet on a hook, insert the hook into the loop of the base and pull the working thread, we have 3 loops on the hook, knit the first two and stop there. You have 2 loops on the hook. Again, make a yarn and from the base loop pull the working thread, total 4 loops and again knit 2 loops and stop, total 3 loops on the hook. Again the yarn and pull the working thread from the loop of the base, total 5 loops on the hook, knit the first 2 and you end up with 4 loops on the hook. Grab the working thread and pull through all 4 loops. The bump pattern is ready. There may be more such columns in the "bump", then the pattern will turn out more magnificent.
The pattern of "cones" basically fits through one air loop. Therefore, after you knit a “bump”, you need to make one air loop and skip 1 loop at the base, i.e. the next "bump" must be knitted in the second loop. And so it fits to the end of the row. Each row begins with 3 lifting loops, ends with knitting a “bump” in the third lifting loop of the previous row.
The second row is knitted even easier, there is no need to count, all the "bumps" fit through one air loop in the spaces between the "bumps" of the previous row.
- Paddy field

A beautiful dense pattern that will certainly attract all eyes to your new skirt. A big plus of this pattern is its simplicity of execution, since it uses crochet and crochet columns for knitting.The pattern is quite dense, but not rigid - so it fits perfectly for a skirt. Its simplicity is also good because it allows you to beautifully combine several different patterns on the same canvas.
For the sample, a chain of air loops is drawn in a multiple of 2, plus 1 loop for the symmetry of the pattern, plus 2 lifting loops.
1st row: 2 lifting stitches, * 1 single crochet and 1 crochet with 1 crochet knitted in the 3rd loop, 1 loop of the chain is skipped * 1 single crochet is crocheted in the last loop of the chain;
2 row: 2 lifting air loops, * 1 single crochet and 1 single crochet * are knitted in a loop of a single crochet *, a single crochet is knitted in the last air loop of a row;
Subsequent rows are knitted in the same way as the second row.
What to choose for a coat?
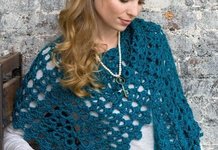
Crocheted demi-season coat is also a very necessary thing in the wardrobe. And the perfect solution in this matter will be a dense crochet pattern for a coat. These patterns make you feel comfortable and confident. They retain their original forms, not allowing things to stretch, and perfectly retain heat. Moreover, many of them look very original on the finished product.
- Tunisian pattern

This pattern is considered ideal for knitting sweaters, cardigans, and most importantly - for coats. The fact is that the structure of this pattern does not allow heat to pass through, practically does not stretch and protects the thing from deformation. To make it clearer how to knit it, it is worth exploring this master class with step-by-step photographs.
Important:For Tunisian knitting, a special long crochet hook is used, because unlike other types of crochet when Tunisian knitting, all loops of the row are located on the hook. The length of the hook must match the width of the fabric, otherwise you will have to stitch individual strips. The hook is held in the hand like a knitting needle. Some use a larger hook than is necessary for the chosen yarn. This provides a slight elasticity to the canvas. Tunisian crocheting requires less yarn than traditional crochet. The loops must be knitted without tightening it much. When knitting, the fabric is curled due to its high stiffness; therefore, it is recommended to steam the knitted parts of the product before connecting them.
We collect a chain of air loops. Starting from the second loop, we pull one loop from each link of the chain, leave them on the hook.

The number of loops of the first row should repeat the number of air loops in the chain. In the second row, we alternately close the loops. This series is also called the “inverse”.
We knit the first loop, then close all other loops in pairs. At the end, there should be one loop on the hook.

The first two rows are always always knitted in the same way for each pattern in Tunisian knitting.
Next, we knit rapport, it consists of two rows. The first row is the capture of loops (they also say that Tunisian knitting is knitting “in a set”), the second row (reverse) is closing. Knitting is not turned inside out, the fabric is always knitted on the front side.
To capture the loops, it is necessary to straighten the first two rows and clearly note the protruding vertical broaches or they are also called Tunisian columns. Alternately, we introduce the hook from right to left through the broach, grab the working thread on the front side and pull it.

Thus, we again loop on the hook. It must be ensured that the loops on the hook are of the same height and not tightened. In the second row, we close the loops in pairs, not forgetting that we close the first one, so we raise our rows.
- Flower meadow

Another option for knitting a charming dense pattern in the form of a floral motif with braids. This pattern is quite complicated in execution, however, it will look great on knitted coats, snoods, leg warmers and many other warm things.
Abbreviations in the knitting pattern:
vp - air loop;
Sc - single crochet;
SS - connecting column.
The pattern is repeated every 4 rows. In the 1st and 3rd rows, gum from SS and berries alternate, and in the 2nd and 4th rows only SS is knitted.
Important: when knitting a pattern, knit all the loops behind the back wall of the loop.
Working process:
Dial 23 v.p. (3 loops for elastic, 4 loops for berries, 4 loops between the berries, 4 loops, 4 loops, 3 loops, 1 loop for lifting) (photo 1).
1 row (front side): the first SS in the second VP from the hook, SS in the trail two loops (photo 2), then the berry fits: * 1 sc in the next. loop, 1 vp, now you need to find the front leg of the just crocheted PRS (see the following figure and video below) (photo 3) crochet, insert a hook into this left front PRS leg, grab and pull the thread, grab the thread again and stretch it through 2 loops on the hook (2 loops left on the hook), i.e. a so-called unfinished double crochet was crocheted (photo 4).

Then you need to double-crochet, insert the hook there (the front leg of the RLS), pull the thread, grab the thread again and stretch it immediately through 3 loops on the hook (2 loops left on the hook), i.e. as if a half-column was crocheted with a crochet, skip one loop (for the 1st row - one vp of the initial chain) (photo 1), insert a hook into the track. loop, pull the thread (3 loops on the hook), grab the thread and stretch it through all 3 loops on the hook (photo 2), BN in the next. loop. * Berry is ready (photo 3). Make 4 SS (photo 4), berry (repeat from * to *), 4 SS for the gap, 3 SS for the elastic.

2 row (wrong side): 1 vp rise, SS to the end of the row (total 22 SS). To make the back walls of the loops more visible, you can keep knitting vertically (photo 1). Be sure to recount the number of SSs to avoid errors. Do not forget to tie the SS in the last loop of the series, which is vp lifting the previous row (photo 2). 3 row: 1 vp lifting, 3 SS for gum, 4 SS for the gap (photo 3), 4 SS, berry, 3 SS for gum. (the berry has shifted in a checkerboard pattern) (photo 4).
4 row: Knit as a 2nd row.
Repeat rows 1-4 to continue the pattern.

Simple lace pattern
Among dense patterns, there are also openwork ones, which due to their multilayer structure of yarn create the effect of relief and airiness. Such a dense openwork crochet pattern is used both for knitting winter or demi-season things, and when creating summer clothing models. In this case, the density of yarn, which is responsible for the "openwork" of a dense pattern, will play a decisive role. Consider several patterns of knitting such ornaments.
- Openwork motive

This simple pattern will also change its functionality depending on the thickness of the chosen yarn, which means that the product will be more “open” if the yarn is thin and more dense if the threads are thick.
In order to start knitting, you need to dial a chain of odd-amount air loops plus 3 air loops for lifting.
1 row: in Knit the 4th air loop of the initial chain 1 tbsp. s / n * 2 pending Art. s / n with one vertex (1st st. s / n in the same vp as the previous st. s / n, skip 1 vp, 2nd st. s / n), 1 tbsp. s / n in the same loop of the initial chain as the second incomplete st.s / n *. What is in ** this is our pattern. We knit it to the end of the row. The series ends with knitting the completed art. s / n in the loop, where the second incomplete art. s / n
2 row: knit 3 vp for lifting. Knit 1 tbsp. s / n in the first art. s / n of the previous row. * 1 tbsp. s / n to the top of the incomplete art. s / n of the previous row, 2 incomplete Art. s / n as in the previous row through 1 loop *. Row finish 1 tbsp. s / n to the top of the incomplete art. s / n of the previous row and another st.s / n in the last st. s / n of the previous row.
The pattern repeats from the 2nd row.
- Wonderful pattern

This crochet pattern also turns out to be both dense and openwork. It will look good on summer skirts, T-shirts, blouses, demi-season hats. Here, the density of the pattern and the degree of openwork depends on the thickness of the yarn.
In order to start knitting, you need to dial a chain of air loops in multiples of 3 plus 2 air loops for lifting.
1st row: It is necessary to knit 2 tbsp. s / n in the 4th VP initial chain. Next, skip 2 vp and 3 knit pattern * 1 tbsp. non-cash, 2 tbsp. s / n *. Again skip 2 vp and knit the pattern until you have 4 air loops left. Two vp skip, and in the 3rd and 4th knit one article. s / n
2 row: Knit 2 vp for lifting. Skip the first art. non-cash (i.e., knit in the first st. s / n of the previous row) and in the second knit 2 tbsp. s / n Next, a pattern fits * 1 tbsp. non-cash, 2 tbsp. s / n * in the single crochet of the previous row. The pattern fits to the last column without the crochet of the previous row. The series ends with the fact that in the first art. s / n of the previous row knits 1 tbsp. s / n and another art. s / n in vp lifting the previous row.
The pattern repeats from the 2nd row.
Video lesson
Another interesting type of dense pattern with which you can knit hats, sweaters or coats will look original and beautiful on any thing. To make the process of learning how to crochet this pattern quick, you can use the video with a detailed master class on knitting this type of "bigwigs".
Crochet a tight crochet video tutorial:


