Shawl knitting, also known as a “string”, “squirt”, “garden beds” and two-part knit patterns, is called the basis of knitting. It is considered one of the simplest patterns, along with stocking knitting, which help novice craftswomen to master the knitting of the same type, in this case, facial, loops.
The name of the shawl pattern got warm, filled with associations with beloved mothers and grandmothers, and it justifies itself - in the old days, often goat shawls were knitted in a similar way.
Knitting pattern

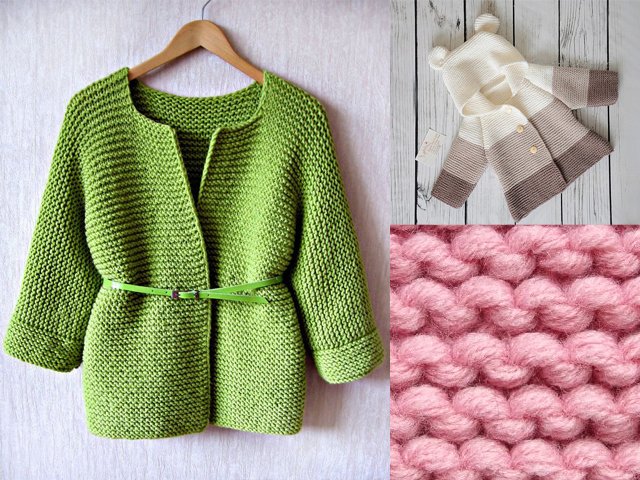
Now, scarf knitting is used with success in creating a variety of models of knitted things: hats, scarves and snoods, cardigans and jackets, coats and much more. Fantasy and taste of the craftswoman allow you to do things incredibly beautiful, combining handkerchief with other, more complex and intricate patterns, resulting in the originality of lines, ornaments and the pattern as a whole.
Of course, having learned to knit a scarf pattern, the craftswomen will want to tackle patterns that are more interesting in their work, however, the scarf knitting can come in handy later at any time, for example, becoming a beautiful background for openwork patterns, aranas, braids, and many other things that the craftswomen plan to create in the future .
What is a garter stitch?

Let's start the study of the basics of knitting - garter stitch. First of all, it’s double-sided type of knitting, so the pattern is often chosen for knitting snoods, scarves, belts, lapels, collars and trims.
In addition, the advantages of scarf knitting are not limited to ease of execution and versatility of use:
- it perfectly retains its original appearance and prevents deformation of the original form of a thing;
- edges with a garter stitch do not twist;
- knitting a scarf pattern gives things airiness - a special volume due to beautiful embossed knitting.
How to knit - scheme and description
So, how to knit shawl knitting? There are several ways to make this two-part pattern. Consider also patterns with detailed descriptions of the knitting process.
- Classic shawl
The most popular and easy version of knitting a scarf pattern. This type of garter stitching is done by the so-called classic facial loops - that is, the needle is inserted behind the front wall of the loop.
Knitting with needles - diagram and description:

- We collect twenty stitches on the knitting needle and begin to knit according to the drawing.
- We remove the first loop, which will be the hem - so the knitting edge will be neat.
- Now we knit the front buttonhole, stretching the needle into the loop in the front and pulling the thread from the back. In this way, you need to knit a row to the very end.
- The last loop is knitted inside out. The spoke should go through the back of the loop and grab the thread in front.
- Turn the product over and start knitting in the same way as the first row: the loops should be front, except for the edge loops, which are located at the edges.
- Garter stitch with "grandmother" facial loops
A more complex way of knitting a shawl pattern, which is used by experienced craftswomen who have determined for themselves the most convenient version of knitting. In the case of the "grandmother's" method of knitting facial loops, the needle is inserted behind the back wall of the loop. This type of scarf knitting is considered not so convenient, however, some needlewomen "recognize" only him.
Knitting pattern and progress:

- We collect the required number of loops in the first row.
- We remove the first loop without knitting, the next - the front.
- The entire first row is the front loops.
- We turn the knitting - we have the wrong loops.
- We remove the first loop, and carefully monitor the progress of work further!
- The working thread for knitting - we knit our wrong loop, as the front loop.
- We knit the next loop as well as the front one. And so on.
- To knit a garter stitch in a circle, you just need to knit the odd rows in the front, and the even ones in the back, or vice versa.
- Garter stitch
Some craftswomen also prefer this method of performing this pattern: they knit it completely exclusively with purl stitches. The pattern as a result is a little wider and friable - that is, the effect of lace is attached.
Knitting pattern and progress:

- We collect the required number of loops on the knitting needles, not forgetting at the end about the first loop removed, which will be edge.
- We take the knitting needle by the string. The working thread should be located to the right of the loop, which is located on the left needle.
- The right knitting needle is inserted into the left loop under the thread.
- To create the wrong loop, you need to grab the thread with the end of the knitting needle, which is in the right hand. You need to stretch it from left to right through the current knitting loop.
- The next and all subsequent loops will be purl, not counting the edge ones. This kind of knitting is shown in more detail in the video tutorial below.
Video lesson
If the schemes and descriptions of the options for performing garter stitching still leave any questions, then for beginners you can always use visual videos on working with knitting needles.
Video - garter knitting classic facial loops:
Video - Handkerchief purl loops:
Video - Handkerchief grandmothers loops:


