To save important correspondence, funny comments of friends to a common photo on your computer, or to capture a frame from your favorite movie - all this and much more can be done with screenshot - i.e take screenshot.
To do this, you do not need to use the phone’s camera, which significantly reduces the quality of the resulting image. To take a screenshot of the laptop screen, you can carry out the manipulations as when creating screenshot on computerthat we talked about earlier. Let's analyze the main points for creating screenshots on laptops with Windows and Mac OS.
How to take a screenshot on a Windows laptop
This operating system allows you to make screenshots on a laptop in several ways at once, many of which are very easy to use. Consider universal options and individual features for different versions of Windows.
The easiest way
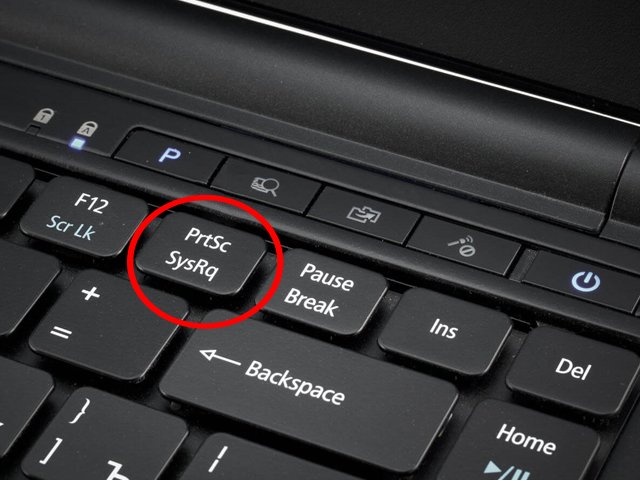
On any laptop running Windows, you can find a button on the keyboardPrtScwhich means Print Screen. It is this button that is reserved for the screenshot creation function.
To make the screen the easiest way, need to:
- Go to the necessary page or open the window whose snapshot you need, press the PrtSc button. If you want to save only a screenshot of the working window, and not the entire screen, then you need to simultaneously press the keys Alt + PrtSc. On Windows 8, you can hold down the buttons Win +PrtSc.With this action, the saved screenshot remains in the clipboard of the laptop.
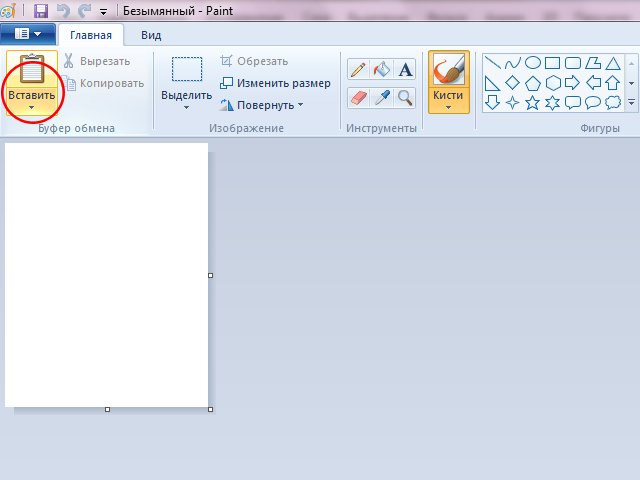
- Now you need to transfer it from there for further storage. For this, any graphic editor program is suitable, be it Paint, Paint.NET, Photoshop or another. We open the program and press the button Insert (or press the key combination Ctrl + V) A screenshot of the entire screen appears in the editor.
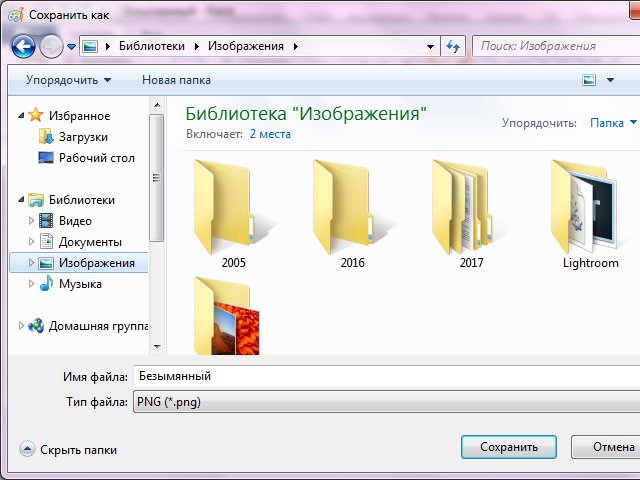
- The final stage is saving your screenshot. To do this, press the button Save or Save as (when you want to choose from baboutnumber of possible formats), and select the folder where your screen will go after saving.
Screenshots on Windows 7 and 8 - Scissors program
A very convenient built-in program for creating screenshots on a laptop and a computer on Windows 7 and 8 generation operating systems - Scissors. It can be found in the section Standard.
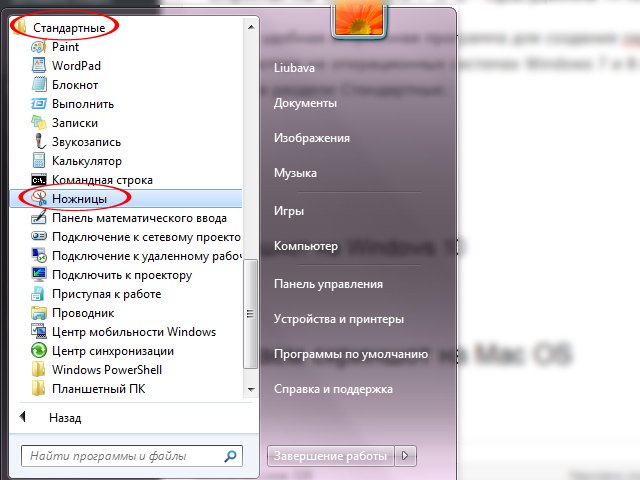
- We go to the page we need to save and leave it open. We find in the Start menu Scissors and open. After clicking on the button Create, you can select a shape for the future selection area.
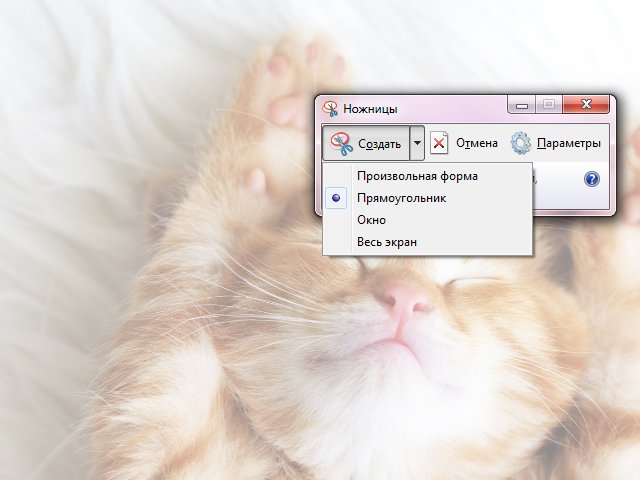
- Select the desired area and get this window:
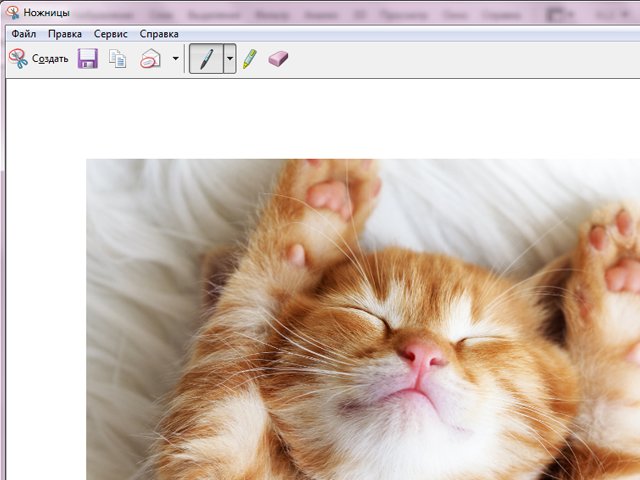
- The program allows you to edit screenshots: make inscriptions, mark areas with a marker and remove excess with an eraser.
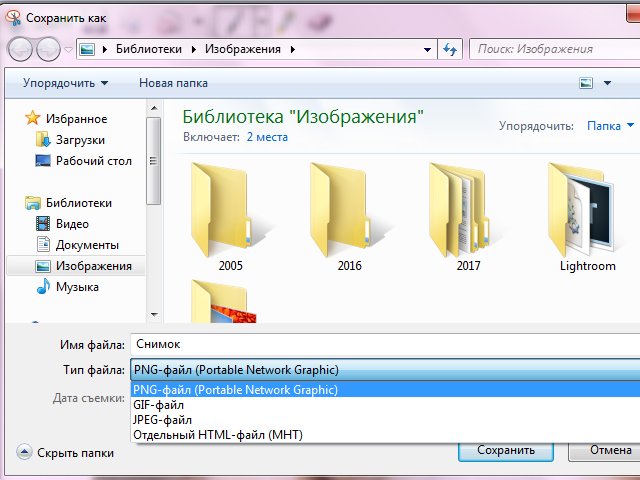
- It remains only to save the picture to the laptop. To do this, select the button in the top menu Save as. This will allow you to give the picture a name, choose a folder to save and the screen format.
Screenshot on Windows 10
This version of the operating system helps to create screenshots on a laptop without unnecessary programs and additional manipulations. Very convenient and easy way.
How to create a screenshot on the tenth Windows:
- We open the page we need;
- Push Win +PrtSc;
- We are looking for a finished screenshot in the folder Screen shots, which is created automatically in the system folder Pictures.
Take a screenshot on Mac OS
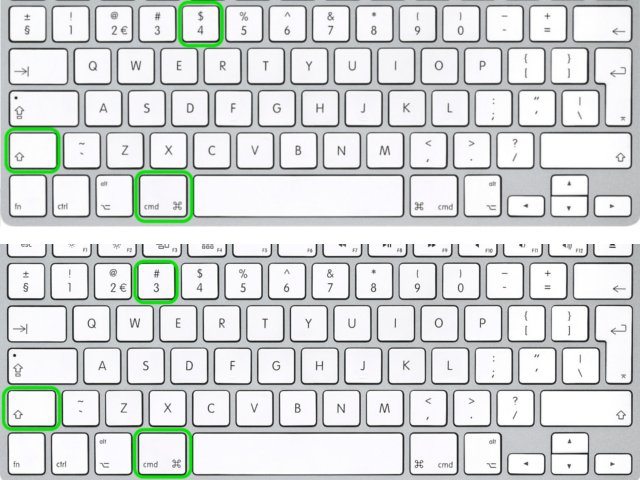
Macs have a different keyboard structure, so their laptops have a different key combination for creating screenshots. However, it is also very comfortable.
The following combinations are suitable:
- For screenshots of the whole screen you need to click cmd (⌘) + shift + 3. The picture is saved to the desktop;
- A key combination is clamped to create a screenshot of a selected area of the screen. cmd (⌘) + shift + 4. After that, the finished picture can also be found on the desktop;
- To create a screen of the working window, click cmd (⌘) + shift + 3 + space. The finished photo is also saved on the desktop.
Screen capture using third-party software
For those laptop users who regularly make screenshots at work or thanks to their hobbies, they came up with special programs for creating screenshots.
They allow you to execute additional commands, such as a screenshot with a scroll (when you need to save a long page in a browser, for example), take several pictures in a row, save pictures to a server with the ability to get links to a finished picture, and other nice editing additions.
Many of these free programs are suitable for both Windows and Mac. You can find out about their additional features and, if you wish, download by clicking on the name of a service.


